Todor Kostov
First version of pong
doodle in flash player
The first part of this project involves making a quick ping-pong game. We first started with making the paddle into a symbol, by Modify -> Convert to Symbol. The next thing was to code it, so it can move and interact with the rest of the game. The coding on each paddle is quite simple and short, here's what it looks like :

This is also the very first time we are introduced to the different codes and what do they do. I'll explain things here for later reference.
onClipEvent (load) works for giving the element some variables to begin with. This is very useful for giving specific things a name, for example - bottom is the bottom of the screen, according to the paddle. It has reached the bottom when it goes to pixel N500 minus the height of the paddle itself, divided by two. That is, due to the center of the paddle being the pixel that counts.
onClipEvent (enterFrame) is for each frame of the second, meaning it happens 24 times each second (for smooth/fluid commands). As long as the requirements are met, this is a continuous action.
The "if" command is for the computer to check. If (requirements), {then this happens}. As you can see, as long as the "up" key is pressed down, the paddle moves up the "y" axis.
"yspeed" is a variable we've determined in the top part, that loads whenever the paddle/game starts. We've set it to 8, since that's a suitable speed for the game.
In _y = _y - yspeed, we use the equal sign as "become". As long as the UP key is pressed, _y becomes _y minus the pixels we've determined earlier, which makes the paddle go up, or move upwards. We have a very similar thing for the Down movement.
The last two "if"s are to stop the paddle from going off screen. It says, that if the _y position of the paddle gets more than the bottom, the position is to stay at the bottom, which we've already given a set fix of 500 minus half the length of the paddle. Similar thing for the top, but this time with "less".


The next element was the ball. This is the most complex part of the whole game, as almost everything is focused around it (coding-wise). The first thing - variables. I've set the ball to move almost diagonally, with a slight tilt to the sides. Then, I decided to put borders to the game, so if the ball goes outside the borders, it will trigger other things. I've made xstart and ystart to have a starting point of the ball. Next, is the scoring, but I'll explain that one later.
On the onClipEvent (enterFrame), I've done several things. With each frame, the ball changes it's _x and _y positions according to the speed I've given beforehand (with each frame, the ball moves 10 pixels on the X axis and 7 pixels on the Y axis). Then, if _x touches the right wall (RW for short), it goes back to starting position (startx and starty). We have a similar thing with the left wall (LW). I even found a mistake here - the xspeed= -xspeed was supposed to have a // before it, to indicate it's inactive. I've changed that now in my flash game. For the _y axis, the walls are easier - a simple change of directions to get back in the screen (yspeed = -yspeed). The next bit is to make the paddles hit the ball. Whenever the ball hits the right paddle, it's similar to the wall - just reverse directions. Same with the left paddle. The (this.hitTest(_parent.rPad)) was something that confused me a lot. The "this" indicates, that whatever the element is, we're talking about that specific element. hitTest is to see if the pixels of the element and the parent collide. Whenever you put an instantname on an element (from the properties of that specific element), you can use this command to refer to it. I've named the right paddle as "rPad" and the left one as "lPad" for easy reference. After this, I decided to go for a quick recording. Here's the result so far :
The next thing I wanted to do, is to add some scoring. By default, the score is a "0", so I made a lscore and a rscore variables. I've made a highscore, which determines when does the game end. I set it to 11, even thought I want the game to end at 10. I think this happens, because it counts the 0 too. Then, I made two dynamic text boxes on the two sides of the screen, to place the score points. They will be shown there.
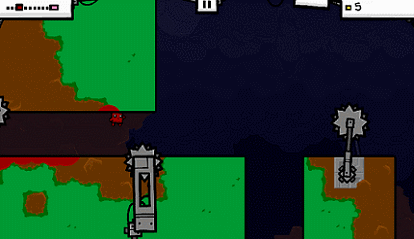
Next thing, was to give those text boxes some instantnames - leftScore and rightScore, accordingly. The box in the bottom of the screen, that appears empty, is also a dynamics box - it's to show who wins in the end. I've instanamed it "finalText". The next thing, is a very simple and effective technique - the ++ command. I've made it, so every time _x > rw the rightscore becomes rscore++, which means it adds one each time this statement is true. This way, the game keeps a track of the score itself. Also, whenever the rscore becomes the same as the highscore (10), the ball moves back to starting position, freezes (speed becomes 0), and the dynamics box kicks in to announce who the winner is. Here's a video of the completed version :

pong with score
For my real game, I'm thinking about a platformer-like game, where everything will be in white/black/gray colour palette. It will be a simple game, where you dash around. I'm thinking about making it more like a challenging/rage/platformer game. I have plenty of inspirations for this, which I will write about now. The first thing that comes to my mind, when thinking of platformer games is Super Meat Boy (by Team Meat). It's a very simple game, with amazing soundtracks / graphics and very interesting gameplay once you get

used to it. The problem I will most likely encounter is the physics of the game. Gravity will be an important factor here, and I have no idea how to make it realistic at the moment. With some videos on youtube, and some guidance from my teacher, I should be fine though.
What I mostly enjoy about Super Meat Boy is the overall atmosphere of the game. The art of the game, combined with the amazing soundtracks makes up for the frustration you feel when playing at times. Here, you can see a simplified version of the original game, most likely made in Flash Player (the second "gif" of the game, just below this text). The game itself uses another engine (a pre-built one, made specifically for the
game).

I decided to start with my main character's animation. For the looks, I took inspiration from a very famous game - League of Legends. One of the characters there (Yasuo) is a badass looking samurai, with long fluffy ponytail hair - exactly what I want. Another inspiration (for the body language of the character) is the flash game Armed With Wings. I took the idle pose from there, with a little twist in how the character looks. After mixing those ideas up and putting them to live, here's my character in idle (just three frames). I am generally happy with the result, and I believe it works pretty well! The next bit is to make him run.
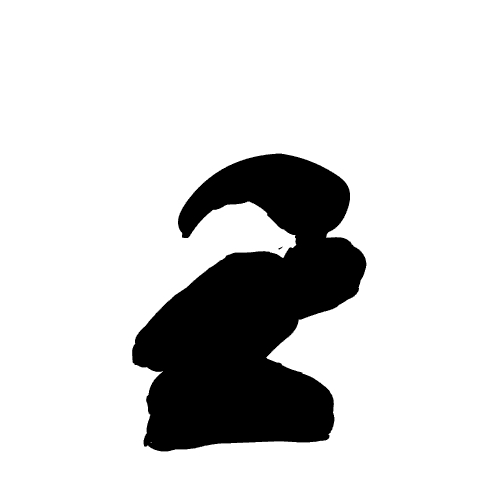
samurai - idle


league of legends - yasuo
lone warrior - armed with wings
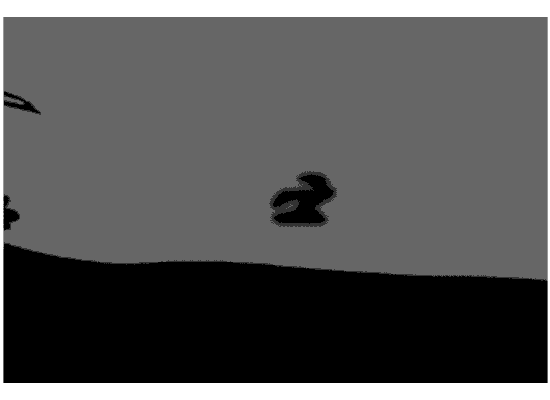
samurai - running
Oddly enough, this thing took me way shorter than expected - I had both the idle and the running animations in just an hour. This is also the very first time I seriously use Flash, so I got pretty much used to the menus and navigating around the program. Once I got the running down, it was time to move on to the next animation I'll use - jumping. I knew this one will be a more difficult one, since I didn't use any references (which is kind of my own fault I guess). I wanted to try and animate everything in my game myself. In the end, after two hours of making my character jump, and lots of deleted frames, I had it! I am particularly proud of how the character's hair acts against the gravity. I believe I got it very well simulated. At this point, I was thinking of something, that will make my game unique. I wanted to add a mechanic, that would look good on a samurai with long hair, and that is something good for a platformer. I used a move, inspired by Yasuo once again - the Sweeping Blade. It lets him dash through units. I decided to make my character be able to dash forward while in mid-air. I had no idea at this point how will the code work exactly, but it was worth giving it a shot. Since I wanted to be done with all the animations and then go on with all the coding, here I was, animating the dash next. This one took some imagination, since I wanted the
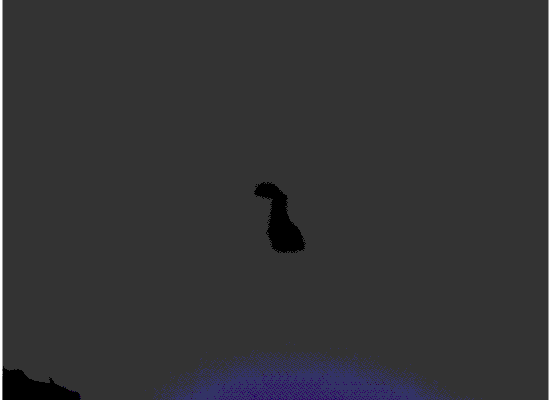
samurai - jumping
Yasuo's sweeping blade


samurai - dash
beginning of the animation to be kind of distorted. That is due to the spike in speed at the beginning. Once this was done, it was time to focus on the coding bit.


Also, another thing worth mentioning before the coding part, is the art style. I chose a generally dark style, which is to a certain extent inspired by the game "Limbo". The whole game is in black/white, which makes it look very surrealistic and immersive. Certain elements are also taken from there - for example, the foreground. It acts like background, but is instead really zoomed in and close to the camera. It's simply decoration, but that's the designer's job, right?

coding
I will try to be as detailed as I can while describing what each line of code does. The very first thing I did is to make the character be able to move. I was not worried about the level design or the animations at this point, as I focused entirely on making the character be able to move and jump. I first added the startY and startX for later, so when the samurai dies, he respawns back where he started. These are all variables, so they work only as shortcuts. Then, I added the speed of the character movement with xspeed. The next bit might be confusing, but let me explain. Since there are tons of ways to add gravity, I partially came up with my own (with some help on making it work). The 't' variable is the gravity that works upwards, or only when you jump. The 'g' is the gravity that pulls you down at all times. 'g' works on every single frame as you can see in line 22.
_y = _y + g; This statement is true for each frame, meaning it's always active, since there are no 'if's' for it. Now, whenever the Spacebar is pressed down (line 15), 't' activates, lifting the samurai due to t>g. That way the character starts going up. The first obvious problem was the character going into space, since once you press jump you just fly. I needed to make the jump more realistic than that, so I added a modifier - 'i'. For each frame the Spacebar is held down, the number 10 becomes modified by a factor of 0.96. This means, that the first frame is 10, second one is 10x0.96, third one is 10x0.96x0.96 and so on, until eventually this 't' number becomes lower than 5, and this is when the gravity starts pulling you back down the ground. The jumpheight is something I never got around using anyway, since I chose the gravity/modifier method instead (I like to call it that). The ground variable is just so the character stands on something, until I make a working ground. xscale is so that the character rotates whenever you go left and then right, or vice-versa. Line 31 and 37 are so that the character can move left and right, with the xspeed already given to be 4. This very basic piece of code is the foundation of all the character movements, except the dash which will be added a bit later. Lines 24 and 25 are so that the character doesn't go below the ground level. All these statements are on the enterFrame event, meaning they are true for every single frame of the game, AKA they are being checked by the computer each 1/24th of the second. Also, I was introduced to the 'trace' method, which proved to be useful here for the first time. You can see in the first screenshot, the numbers on the bottom right corner. The idea is, to be able to keep a track of how the numbers change. In this example, I'm tracing 't' to see how it'll react to the modifier for each frame. You can also use trace to see if two objects are colliding according to the computer, and to see whether they are being recognized. It really does come in handly. Here's my progress so far. The character moves and jumps very smoothly, so overall I'm really happy with the results. The next bit is to create the dash code and add some more things. I'll also need to add way more variables. You can also see some background work, but that'll surely be changed in the near future. For now I just want to get all the coding part down.


For the next part, I needed some new variables. I had in mind :
- A new modifier for the dash I was about to create.
- A jump factor that will allow me to only dash while in the air.
- Some variables for the different animations.
I made the 'p' modifier for the dash, since a 0.96 was too slow. I needed the dash to start out really fast and slow down really fast, like a sudden burst of speed while in mid-air. First, I added the dash speed, which is named 'dash' for easy reference. I played around with the numbers, and found out that 25 is perfect. Then, I added the 'p' modifier to be 0.85 which slows down the dash tremendously quick. The runStartVar and jumpStartVar are for the animations, I'll get back to those a bit later. It was time to add the dash. First, I made it so if you press space, the jump variable turns to 'true'. This is to avoid being able to dash multiple times in a single jump. Then, I made it so that whenever you dash, it first checks whether the jump value is either true or false. If it's true, you cannot reset your dash midair. If it's false, it resets automatically (the 'dash' goes back to being 25). The Then, I added the dash code itself.
Line 26 makes it so the jump actually works once it's checked. It makes your _y positions (height axis) go up by the 't' factor.
Line 27 turns your jump to true while all of the above is true.
Line 28 makes the 't' factor become gradually lower so you can fall afterwards.
Then, lines 35 to 41 are to indicate, that if the samurai is above the ground, the dash and the 't' modifier are to return back to normal (25 and 10, in their order). At this point, it was time to add the dash itself. I wanted to make it so you can only dash while the following is true :
- The samurai is in the air.
- The samurai is moving in some direction (holding down either A or D).
That meant I have to add two 'if' statements. First one is line 42.
if (Key.isDown(65)) means that you have to hold that direction.
Next one is line 52. if (jump == true). This checks whether the character is midair (since it turns to true while the character's 'Y' axis is higher than the ground floor from the earlier codes). If both of the above statements are true, only then the character proceeds to dash. Line 50 binds the dash to be with the "E" key (Key 69).
_x = _x - dash makes the character move horizontally with the dash speed (it's a minus sign, since that's when the character is going to the left). Then, the dash modifier (line 56) makes it so that the dash loses speed very quickly. The same thing is copied for the other direction too (line 62 to 82). This code, shown on the right, is checked and working, but that doesn't mean my ride was so good. I had lots and lots of glitches with making this work, like the character being able to dash on the ground, the jump function completely broke, being able to jump multiple times while already being mid-air, etc. It was finally time to start making the animations work. Now, this next part was extremely confusing to me at first (and it still confuses me at times), but with some help I managed to get it working in the end. I'll first show the results so far, and then will proceed with explaining the animations bit. Here's how it all looks like so far.
Another interesting thing you can notice in the video is the foreground I was talking about. You can see the tree I'm passing through, I tried to make it a part of the foreground just to see how it'll work out. I really enjoyed the idea of having such elements in my level, as they add another layer of depth to the whole scene. The ground is still not fixed at this point, but that's not what concerns me. You can see the dash is working properly, the animation is working as well (at least when moving to the left). The jump animation was working only for the first time the samurai jumps, which will be fixed a bit later. I also added some background, since I didn't like the plain gray background. The level will still be morphed multiple times before it's ready, I'm pretty sure, but I just didn't want the whole scene to look so boring while I was working on it. Time to start the animation explanation I guess. Here we go!
First, a quick introduction to what everything is. This whole animation is a symbol in the main directory of the game. We are working on the symbol at the moment, and that's why it has different components here. It's like how folders work - you have a desktop, in it you have 'my computer' and inside you have folders. The principle here is the same - the symbol itself is the a folder, and the game project is your desktop.

Layer 1 is the layer on which the animation is. Each black dot you see there is a 'keyframe'. Each keyframe indicates something changes on that frame. For example, on frame one we have the samurai in idle pose. On frame 3 that pose slightly changes, to make it look animated and not completely still.
Then, we have the 'label' layer. This is the second layer, on which you can see some red flags. Each of those flags holds a label, with a name. The idea of these labels is to cut out the different animations. We have an 'idleStart' and an 'idleStop' at the beginning. The idea is to seperate the 'idle' pose of the samurai from the rest, so that the engine itself can understand when does it start and when does it end. This section is now the 'idle', according to the computer. It's the same for the 'run' and the 'jump'.The third layer, or 'Layer 3' is for the coding. On the sixth frame, you can see a small circle with an 'a' on top of it. This indicates 'action'. On this frame of the

the animation something happens. The script for the sixth frame is quite simple, just a plain 'gotoAndPlay(1);'.What this does, is it sends the animation to play back from frame one. This creates a never endingloop for the idle status, which is what we're looking for. Now, if you look at the top code again,on line 84 we have and onClipEvent (keyUp). This indicates, that those actions will happen if we release all keys and just lean back to drink some soda. What happens, is it goes back and plays the idle animation again, which then proceeds to repeat itself again and again, until a key is pressed
again. There's also a runStartVar = false, which we'll use for the running animation. You can see it starts at frame 26 and stops at frame 50. On frame 50, we have the same 'gotoAndPlay' code, but this time it's 'gotoAndPlay(runStart)'. This loops the running animation as well. All that's left now, is to actually put the running animation to live. Since this is not the default animation of the character (it's Idle), I need to turn on the variable from the samurai itself, so that it realizes it's playing an animation and so that it can play it properly. This script is on the runStart frame, on Layer 3. It turns the variable

on. The idea is to not confuse the computer into playing the RunStop animation over and over again, which takes priority over the animation itself. I had to come up with this, because my samurai would only play one frame instead of the whole animation when the correct key is pressed down. The animation is now triggered only if the variable is false (line 44), which immediately turns to true after the running starts. Line 45 to 47 are the reason the animation starts.


This version of the game is the first time I encountered a serious problem. I had to make a layer, called ground, which would act as a platform for my character to step on. I managed to get all animations working at this point, even the dash, but after adding the ground layer, the game crashed when my character stepped on it. On line 16, you can see a '_root.ground', which indicates that the ground floor is not a part of the samurai itself, and instead, that instance name is in the main directory of the game. I made it like that, so the engine can know what I mean when I write 'ground', and so that I won't have to write _root.ground each time, but just a simple ground instead. 'touchingGround' indicates whether or not my character is colliding with the 'ground' layer. Now, here's the interesting part - the ground hit test on line 34.
It states the following : As long as the samurai is touching the ground, and not the box - the actual drawing of the ground, the gravity is to go down to 0. This stops the character from moving any more down, and de-activates the gravity that's pulling the character downwards at all times. Theoretically, as soon as you lift off the ground, the gravity is turned on again and that helps to bring the samurai back to the ground. The '.hitTest' command, works as a rule - this is true, only when the two units are colliding with each other. The brackets after that, are to state that this is true for the _x and _y points of this character, and for it's true shape. If the 'true' bit isn't there, it will look at the box of the symbol, not for the symbol itself. Then, we have line 39, which turns the touchingGround rule to true, and the 'else' statement, that says if the first one isn't true, then it's false. Theoretically, all of this should be working - but there was a flaw somewhere. Whenever the samurai touched the ground, the whole game would freeze and crash eventually. I was pretty upset about it, but decided to make the ground work in another way instead - without any 'if' or 'else' statements, to make sure it will be functioning despite any rules. Here's a screenshot of the experiment - I made a line on the 'ground' layer, turned it into a symbol and tested it. My character would fall down, touch the line and freeze the whole program. I got some help - we tried to fix it, but to no avail. This is the moment I decided to revamp my whole game - environment, background, ideas, etc.
The new idea was a bit different - instead of an open environment, I decided to go for a cave. The dark artstyle would fit it perfectly well, I thought, and I started drawing it. I also wanted to make some small animations to make the game look more fluid, and I had a pretty simple, but effective idea on how to make the ground work. I started with the design this time, because my new idea was going to work for sure.

Full with hope once again, I started drawing some script animations. These would only play once, and only when the player passes through certain places. The first one would be quite simple - caves are dirty, so why not have a place, where the dirt goes up like in a windy motion? I started drawing it frame by frame, without using any references. I wanted to make it my own way, and I'm quite proud of the result.
Full with hope once again, I started drawing some script animations. These would only play once, and only when the player passes through certain places. The first one would be quite simple - caves are dirty, so why not have a place, where the dirt goes up like in a windy motion? I started drawing it frame by frame, without using any references. I wanted to make it my own way, and I'm quite proud of the result.

The next simple animation I wanted, is a little spider. I was wondering whether to make a bat or spider until the end, but ended up with a spider. It's not perfectly animated, but it will be small in the game, and not really all that significant. The next part was to make the level design, and to make it as good as possible. I will just leave the final, working code on the right side of the screen and have my designs on the left with some annotations.
I started off by making a simple cave - in black and white. The background remained the same - a tiny bit darker, actually, since I liked the style of it. Here's the base of the cave.

Next, I wanted some sort of deadly obstacle, in which you'll have to use the dash, so I made lava next. I added some blur effect to it, and animated four frames that would keep looping to give it a realistic look. Here's a still image of it.

Next - a foreground. Those are small details, that won't interact with the character in any way. They work great, since they add a bit of depth to the scene. I also blurred them, since the closer an item is to the eye - the blurrier it is.

I wanted more animated things in my scene, so I drew some torches next. I believe they're a very nice addition to the scene, since they give it a feeling of movement - the more things move on the screen at the same time, the better.


I added some more details to the scene and both animations in the next screenshot. This is the final version of the game, and it's exactly as it looks in-game. I had two obstacles, some small and easy platforming near the end of the level, and everything was functioning. I also added a tutorial on how to play the game, but kept is very subtle, since the whole black-and-white artstyle suggests a simplistic game, where exploration is key. I also added a second layer of caves in the background, to add depth to the scene and to make it more realistic.
A close-up screenshot of the tutorial in the beginning. It shows you the controls and how to get over that first jump.
As for the coding, here's how I got the ground to work :
Lines 103 to 170 are all the 'ground' rules. I've stated the following : If the character gets past ..... X position, the 'ground' line becomes a different number. I've also made it so the 'death' position on the 'y' axis is less than 440, meaning that if the character goes below a certain point, he will return to the starting position. Let's see exactly how this works.
Line 104 : if (_x < 220) { ground = 400 } ; From the start of the level until the edge of where the lava starts, the ground is with a value of 400. This is a safe ground, since death occurs only if you go below a certain point, which is lower than the ground level. This means, that the character cannot get to this point, thus cannot die.
Line 108 : if (_x > 220) { ground = 800 } ; From the first edge of the lava pit to the second edge of it - this is a 'death zone'. The ground level is now way lower, so you can fall more. If you go beyond a certain point, you die.
Line 112 : if (_x > 520) { ground = 400 } ; Back to safety. And so on.
Line 117 : if (_y > 440) { if (_x < 1600) { _x = startX ; _y = startY } } This line is the death result. Once you go above _y level of 440, you go back to starting position. This is, however, only true before a certain point on the 'x' axis, since the death height becomes lower after that.
I came up with this method myself, since I got my brain to think of a way to save my project. You can see it's a very simple one, but it saved me in the worst of times. I overall loved this project, since it got me thinking numerous times, and finally made me realize how the coding languages work. It was way more complicated than I initially thought, but I'm very glad with the result. It even made me think whether to go for 2D games and whether it's a good idea to make one in my spare time.Here's a video of me, playing through my game and the game itself.